Installation Instructions for GIN Server#
There are five servers dedicated to Bristol GIN. Server[0] contains a Bristol GIN web frontend. Server[1] is the main node of the Bristol GIN data storage system housing Ceph installation. All five servers are part of the Ceph cluster encompassing roughly 5TB of raw storage space in total. All data stored on Bristol GIN is either backed up twice or once by the Ceph storage system. Therefore, the real storage capacity varies between roughly 1.7TB to 2.5TB.
Install Ceph#
https://ceph.io/en/ https://docs.ceph.com/en/octopus/ https://docs.ceph.com/en/latest/start/intro/
Install Cephadm#
The Ceph cluster is installed, deployed and managed using cephadm command line tools. Hence, we need to install cephadm first before we can deploy the Ceph cluster. We start by loging into Server[1]. This server is going to be the main node of the Ceph cluster.
If your sudo user is not passwordless, you need to make it passwordless. Open the sudoers file by typing in the Linux terminal:
sudo yum update
sudo yum install nano
sudo nano /etc/sudoers
Inside the file comment the line
%wheel ALL=(ALL) ALL
and uncomment the line below:
%wheel ALL=(ALL) NOPASSWD: ALL
Now you should be able to call sudo commands without being required to type in your password.
The next is to install cephadm dependencies. We start with Python 3:
sudo yum install python3
sudo nano ~/.bashrc
Add alias python=/usr/bin/python3 line to your bash.rc script, save it, and reload it:
source ~/.bashrc
The latter addition to .bashrc file makes Python 3 as your primary Python interpreter.
Other cephadm dependencies include systemd and Podman. We install those next:
sudo yum install systemd
sudo yum -y install podman
Docker is yet another cephadm dependency. Docker installation is, however, optional if you have already installed Podman. In any case, the installation commands are below:
sudo yum install -y yum-utils
sudo yum-config-manager \
  --add-repo \
  https://download.docker.com/linux/centos/docker-ce.repo
sudo yum install docker-ce docker-ce-cli containerd.io docker-compose-plugin
Install the remaining cephadm dependencies: chrony, ntp, and lvm2.
sudo yum install chrony
sudo yum install ntp
sudo yum install lvm2
We can now proceed with the actual cephadm installation:
curl --silent --remote-name --location https://github.com/ceph/ceph/raw/quincy/src/cephadm/cephadm
chmod +x cephadm
sudo ./cephadm add-repo --release octopus
sudo rpm --import 'https://download.ceph.com/keys/release.asc'
sudo ./cephadm install
As you can see, we did not install the latest Ceph version. This is because Linux Centos 7 operating system does not work with Ceph versions newer than Octopus.
Finally, enable Ceph command line interface (CLI):
sudo cephadm install ceph-common
Install Ceph Cluster#
Once cephadm is installed, install the Ceph cluster. We start by boostraping a new cluster:
sudo cephadm bootstrap --mon-ip <main-backend-server1-ip> --allow-fqdn-hostname --allow-overwrite --ssh-user <your-username>
Next, we add other hosts to the Ceph cluster. In order to do that, login to all servers (Server[2], Server[3], Server[4], and Server[0]) except the main one (Server[1]) and perform all prerequisite actions needed to add these servers to the Ceph cluster: setting a passwordless sudo access and installing all the required dependencies. Following that, install Ceph CLI:
sudo yum install ceph-common
We also need to create a logical volume on partition dev/sdb1 of the data disk dev/sdb on all of our servers, including Server[1]. We start by preventing the automatic mounting of the /dev/sdb1 partition onto /data folder. To do that, open /etc/fstab file:
sudo nano /etc/fstab
Inside the file replace the last line
UUID=<some-UUID> /data ext4 defaults
with the line
UUID=<some-UUID> /data ext4 defaults,noauto,user
Reboot the server. Finally, we create a volume group containing this partition which can be used to create a logical volume:
sudo vgcreate vg1 /dev/sdb1
sudo lvcreate -l 100%FREE -n lv1 vg1
Reboot each server again following the setup.
Now we can add the remaining hosts to the cluster. Login to the main Ceph node (Server[1]) and setup Ceph Secure Shell (SSH) access to all additional hosts:
ssh-copy-id -f -i /etc/ceph/ceph.pub <your-username>@<backend-server2-ip>
ssh-copy-id -f -i /etc/ceph/ceph.pub <your-username>@<backend-server3-ip>
ssh-copy-id -f -i /etc/ceph/ceph.pub <your-username>@<backend-server4-ip>
ssh-copy-id -f -i /etc/ceph/ceph.pub <your-username>@<frontend-server0-ip>
Tell Ceph that the new nodes are part of the cluster:
sudo ceph orch host add <backend-server2-name> <backend-server2-ip> --labels _admin
sudo ceph orch host add <backend-server3-name> <backend-server3-ip> --labels _admin
sudo ceph orch host add <backend-server4-name> <backend-server4-ip> --labels _admin
sudo ceph orch host add <frontend-server0-name> <frontend-server0-ip> --labels _admin
Finally, add storage to the cluster by creating OSDs on all servers:
sudo ceph orch daemon add osd <main-backend-server1-name>:/dev/vg1/lv1
sudo ceph orch daemon add osd <backend-server2-name>:/dev/vg1/lv1
sudo ceph orch daemon add osd <backend-server3-name>:/dev/vg1/lv1
sudo ceph orch daemon add osd <backend-server4-name>:/dev/vg1/lv1
sudo ceph orch daemon add osd <frontend-server0-name>:/dev/vg1/lv1
Reboot the main host. The Ceph cluster is now up and running.
Deploy Ceph Cluster#
We are going to use the Ceph cluster as a file system. For the next step we, therefore, deploy CephFS:
sudo ceph fs volume create gin-backend
Now check the status of your cluster by typing:
$ sudo ceph status
  cluster:
    id:     9be8c6b4-74d3-11ed-be0e-005056811b5d
    health: HEALTH_OK

  services:
    mon: 5 daemons, quorum <main-backend-server1-name>,caas-b4bd-x0698,caas-1c47-x0696,caas-dbc9-x0700,caas-9d6b-x0699 (age 27m)
    mgr: <main-backend-server1-name>.iovomf(active, since 27m), standbys: caas-b4bd-x0698.osyhxj
    mds: gin-backend:1 {0=gin-backend.caas-1c47-x0696.ifbdko=up:active} 1 up:standby
    osd: 5 osds: 5 up (since 27m), 5 in (since 27m)

  data:
    pools:   3 pools, 65 pgs
    objects: 22 objects, 2.2 KiB
    usage:   5.0 GiB used, 4.9 TiB / 4.9 TiB avail
    pgs:     65 active+clean
You should see a similar output indicating that you have 5 OSDs (object storage devices), 5 daemons, and roughly 5TB of raw data storage available. The actual storage space is only 33% of the raw storage because the stored data is being replicated 3 times (see size parameter below) by default. It is a good idea to keep this set up which allows 3 out of 5 cluster nodes to fail without affecting the stored data in theory. You can check the parameters of your data storage pool by typing:
$ sudo ceph osd pool get cephfs.gin-backend.data all
size: 3
min_size: 2
pg_num: 32
pgp_num: 32
crush_rule: replicated_rule
hashpspool: true
nodelete: false
nopgchange: false
nosizechange: false
write_fadvise_dontneed: false
noscrub: false
nodeep-scrub: false
use_gmt_hitset: 1
fast_read: 0
pg_autoscale_mode: on
Finally, we are going to mount the newly created gin-backend volume. For that we need to login to the GIN frontend server (Server[0] or the client host). Now generate a minimal conf file for the client host, place it at a standard location, and adjust its permissions:
sudo mkdir -p -m 755 /etc/ceph
ssh <your-username>@<main-backend-server1-ip> "sudo ceph config generate-minimal-conf" | sudo tee /etc/ceph/ceph.conf
sudo chmod 644 /etc/ceph/ceph.conf
Create a cephx user (the cephx protocol authenticates Ceph clients and servers to each other) and get its secret key:
ssh <your-username>@<main-backend-server1-ip> "sudo ceph fs authorize gin-backend client.<your-username> / rw" | sudo tee /etc/ceph/ceph.client.<your-username>.keyring
sudo chmod 600 /etc/ceph/ceph.client.<your-username>.keyring
Perform the actual mounting of CephFS:
mkdir /mnt/cephfs
sudo mount -t ceph <any-server-ip>:6789:/ /mnt/cephfs -o name=<your-username>
To permanently mount CephFS, open /etc/fstab:
sudo nano /etc/fstab
Add the following line at the end of the file:
<server0-ip>:6789,<server1-ip>:6789,<server2-ip>:6789,<server3-ip>:6789,<server4-ip>:6789:/ /mnt/cephfs ceph name=<your-username>,noatime,_netdev 0 0
Reboot the node. You are now set for installing GIN on your computing cluster. /mnt/cephfs folder will act as an interface for GIN’s backend storage.
Install Docker#
Docker Engine, Docker CLI, and Docker Compose are dependencies required for GIN installation on a server.
You may have already installed all of these Docker components earlier prior to installing Ceph. In that case you can skip this section. If you did not install Docker earlier, the installation instructions for Centos 7 are straight-forward. Just execute the commands below in the terminal on the client node (Server[0]):
sudo yum install -y yum-utils
sudo yum-config-manager \
  --add-repo \
  https://download.docker.com/linux/centos/docker-ce.repo
sudo yum install docker-ce docker-ce-cli containerd.io docker-compose-plugin -y
The final command installs all of the needed Docker components.
Install OpenSSL#
Installing the latest OpenSSL is needed in order to install the latest Apache Web Server which supports HTTP/2 protocol. The later allows you to obtain an SSL cerificate and use https rather than http for accessing Bristol GIN. If you type in openssl version in your terminal, you would probably get OpenSSL 1.0.2k-fips as an answer which is not up to date for our purposes. Thus, start by installing prerequisites for the new installation:
sudo yum install libtool perl-core zlib-devel -y
Now download and install OpenSSL:
curl -O -L https://github.com/openssl/openssl/archive/OpenSSL_1_1_1s.tar.gz
tar -zxvf OpenSSL_1_1_1s.tar.gz
cd openssl-OpenSSL_1_1_1s
./config --prefix=/usr/local/openssl --openssldir=/usr/local/openssl shared zlib
make
make test
You should expect tests to pass successfully (oterwise you would need to troubleshoot):
...
All tests successful.
Files=158, Tests=2650, 99 wallclock secs ( 1.41 usr  0.12 sys + 75.45 cusr 19.21 csys = 96.19 CPU)
Result: PASS
...
Install the software:
sudo make install
Add the new version to the path:
cd ..
rm -rf OpenSSL_1_1_1s.tar.gz
sudo nano /etc/profile.d/openssl.sh
Add the lines below to your file:
# /etc/profile.d/openssl.sh
pathmunge /usr/local/openssl/bin
Link shared libraries by opening the following file:
sudo nano /etc/ld.so.conf.d/openssl-1.1.1c.conf
Add the lines below to your file:
# /etc/ld.so/conf.d/openssl-1.1.1c.conf
/usr/local/openssl/lib
Finally, reload your shell and check the OpenSSL version:
$ exec bash
$ openssl version
OpenSSL 1.1.1s  1 Nov 2022
Install and Configure Apache Web Server#
Apache web server has to be installed as a prerequisite for GIN installation. GIN is a web app and, as such, it needs a web server software to manage its access. The installation offered by the local package manager is out of data, so we are going to install Apache from the source code.
Get Source Code#
To start, make sure that the old version is removed:
sudo yum remove httpd -y
Install prerequisites:
sudo yum install autoconf expat-devel libtool libnghttp2-devel pcre-devel -y
Download and unpack the source code:
curl -O -L https://github.com/apache/httpd/archive/2.4.54.tar.gz
curl -O -L https://github.com/apache/apr/archive/1.7.0.tar.gz
curl -O -L https://github.com/apache/apr-util/archive/1.6.1.tar.gz
tar -zxvf 2.4.54.tar.gz
tar -zxvf 1.7.0.tar.gz
tar -zxvf 1.6.1.tar.gz
cp -r apr-1.7.0 httpd-2.4.54/srclib/apr
cp -r apr-util-1.6.1 httpd-2.4.54/srclib/apr-util
Install Apache#
Get inside httpd directory, compile, and install Apache:
cd httpd-2.4.54
./buildconf
./configure --enable-ssl --enable-so --enable-http2 --disable-v4-mapped --with-mpm=event --with-included-apr --with-ssl=/usr/local/openssl --prefix=/usr/local/apache2
make
sudo make install
Below is the meaning of configure options:
--enable-sslwill build Apache with SSL support, so you can enable HTTPS for Bristol GIN.--enable-sowill enable dynamically loaded modules, so you can enable and disable modules without recompilation.--enable-http2will enable HTTP/2 support.--disable-v4-mappeddisables handling of IPv4 connections with an IPv6 socket.--with-mpmwill set multiprocessing modules for Apache.--with-included-aprIt will use APR library that you copied to srclib directory.--with-sslwill point compiler to newer version of OpenSSL.--prefixis the installation path for Apache httpd compiled package.
Add Apache executables to the path by opening the following file:
sudo nano /etc/profile.d/httpd.sh
and paste there following contents:
pathmunge /usr/local/apache2/bin
Reload the terminal and cleanup:
exec bash
cd ..
rm -rf 1.7.0.tar.gz 1.6.1.tar.gz 2.4.54.tar.gz apr-1.7.0 apr-util-1.6.1
Finally, add systemd entry. Open the following file:
sudo nano /etc/systemd/system/httpd.service
and add the following text to it:
[Unit]
Description=The Apache HTTP Server
After=network.target

[Service]
Type=forking
ExecStart=/usr/local/apache2/bin/apachectl -k start
ExecReload=/usr/local/apache2/bin/apachectl -k graceful
ExecStop=/usr/local/apache2/bin/apachectl -k graceful-stop
PIDFile=/usr/local/apache2/logs/httpd.pid
PrivateTmp=true

[Install]
WantedBy=multi-user.target
After saving, reload the systemctl daemon and start Apache:
sudo systemctl daemon-reload
sudo systemctl enable httpd
sudo systemctl start httpd
You can confirm that Apache is running if you type:
$ sudo systemctl status httpd
● httpd.service - The Apache HTTP Server
   Loaded: loaded (/etc/systemd/system/httpd.service; disabled; vendor preset: disabled)
   Active: active (running) since Thu 2022-12-15 01:15:30 GMT; 26s ago
  Process: 4084 ExecStart=/usr/local/apache2/bin/apachectl -k start (code=exited, status=0/SUCCESS)
 Main PID: 4087 (httpd)
   CGroup: /system.slice/httpd.service
           ├─4087 /usr/local/apache2/bin/httpd -k start
           ├─4088 /usr/local/apache2/bin/httpd -k start
           ├─4089 /usr/local/apache2/bin/httpd -k start
           └─4090 /usr/local/apache2/bin/httpd -k start

Dec 15 01:15:30 caas-1c47-x0696.caas.bris.ac.uk systemd[1]: Starting The Apache HTTP Server...
Dec 15 01:15:30 caas-1c47-x0696.caas.bris.ac.uk systemd[1]: Started The Apache HTTP Server.
To check that Apache is transfering data, type:
$ curl http://<ip-address-of-machine-with-apache-installation>
<html><body><h1>It works!</h1></body></html>
Configure Apache#
We are going to create the basic configuration of Apache now by editing httpd.conf file:
sudo nano /usr/local/apache2/conf/httpd.conf
Inside the file replace the line
Listen 80
with these lines:
#Listen 80
Listen [::]:80
Listen 0.0.0.0:80
Replace the line defining ServerName
#ServerName www.example.com:80
with the lines:
#ServerName www.example.com:80
ServerName <ip-address-of-machine-with-apache-installation>
Uncomment lines for loading proxy server modules:
LoadModule proxy_module modules/mod_proxy.so
LoadModule proxy_http_module modules/mod_proxy_http.so
At the bottom of the file add the following definitions:
# Additional entries below
# Hide Apache version from header and from error files
ServerTokens prod
ServerSignature off

# Disable ETag to prevent disposing sensitive values like iNode
FileETag none

# Apache proxypass configuration
ProxyPass "/"  "http://localhost:3000/"
ProxyPassReverse "/"  "http://localhost:3000/"

# Prevent exposing debug console
<Location /debug>
    Deny from  all
</Location>
Finally, allow Apache to communicate via the firewall:
sudo systemctl start firewalld
sudo firewall-cmd --permanent --add-service=http
sudo firewall-cmd --permanent --add-service=https
sudo firewall-cmd --reload
sudo systemctl restart httpd
Test Apache Connection#
Once Apache is installed and configured in the most basic manner, you should test whether you can connect to Apache remotely. On your own laptop with Linux or the Windows Subsystem for Linux (WSL) connected to the University of Bristol (UoB) VPN type the following command into the Linux terminal:
$ nmap -sT <ip-address-of-machine-with-apache-installation>
Starting Nmap 7.80 ( https://nmap.org ) at 2022-12-15 14:01 GMT
Nmap scan report for <ip-address-of-machine-with-apache-installation>
Host is up (0.051s latency).
Not shown: 996 filtered ports
PORT     STATE  SERVICE
22/tcp   open   ssh
80/tcp   open   http
443/tcp  closed https
3389/tcp closed ms-wbt-server

Nmap done: 1 IP address (1 host up) scanned in 5.84 seconds
Command nmap shows open ports on the server with Apache installation that are visible to a remote computer. Apache uses port 80 for HTTP communication and we have just established that it is not blocked by the host firewall.
Another useful command that you can run on the host with Apache installation is
$ sudo netstat -tlpn
Active Internet connections (only servers)
Proto Recv-Q Send-Q Local Address           Foreign Address         State       PID/Program name
tcp        0      0 <host-ip>:3300          0.0.0.0:*               LISTEN      1517/ceph-mon
tcp        0      0 <host-ip>:6789          0.0.0.0:*               LISTEN      1517/ceph-mon
tcp        0      0 0.0.0.0:80              0.0.0.0:*               LISTEN      11690/httpd
tcp        0      0 0.0.0.0:6800            0.0.0.0:*               LISTEN      1496/ceph-mds
tcp        0      0 0.0.0.0:6801            0.0.0.0:*               LISTEN      1496/ceph-mds
tcp        0      0 0.0.0.0:22              0.0.0.0:*               LISTEN      1080/sshd
tcp        0      0 127.0.0.1:25            0.0.0.0:*               LISTEN      1560/master
tcp6       0      0 :::9100                 :::*                    LISTEN      1505/node_exporter
tcp6       0      0 :::80                   :::*                    LISTEN      11690/httpd
tcp6       0      0 :::22                   :::*                    LISTEN      1080/sshd
tcp6       0      0 ::1:25                  :::*                    LISTEN      1560/master
This command shows all network connections. The lines that are important in our case are the following:
tcp        0      0 0.0.0.0:80              0.0.0.0:*               LISTEN      11690/httpd
tcp6       0      0 :::80                   :::*                    LISTEN      11690/httpd
They tell us that IPv4 and IPv6 type connections via port 80 are unrestrictive and are reserved for Apache. Therefore, we should be able transfer data via these ports from/to our remote computer. On your laptop type:
$ curl http://<ip-address-of-machine-with-apache-installation>
<html><body><h1>It works!</h1></body></html>
The above message indicates that connection is working fine. However, if you get the following reply instead:
curl: (56) Recv failure: Connection reset by peer
It indicates that your connection is being blocked by some process on the Apache host (possibly a firewall of some kind) and you need to troubleshoot.
Set up SSH Tunneling#
Currently UoB Self-Service Virtual Machines do not allow HTTP or HTTPS connections. The only ports open are 22 (SSH), 80 (SSH), and 3389 (Internet Control Message Protocol, ICMP). Ports that are typically used by Apache for HTTP (port 80) and HTTPS (port 443) are currently reserved for SSH connections or blocked by the university IT Services, respectively. However, port 443 is planned to be opened for HTTPS connections some time in March. Meanwhile, for testing purposes port 80 can be used to set up SSH HTTP tunneling with local port forwarding. To do so, first we need to set up passwordless SSH access from our local computer (must be connected to the UoB VPN) to the university server with our Apache installation. Type in the following commands in the Linux terminal on your local computer:
cd ~/.ssh
sudo ssh-keygen -t rsa
sudo ssh-copy-id -i ~/.ssh/id_rsa.pub <username>@<ip-address-of-machine-with-apache-installation>
ssh <username>@<ip-address-of-machine-with-apache-installation>
After typing in the last command you should be able to login instantly without being asked for your password. If that is not the case, you can try an alternative set of commands:
cd ~/.ssh
sudo ssh-keygen -t rsa
scp ~/.ssh/id_rsa.pub <username>@<ip-address-of-machine-with-apache-installation>:/tmp/id_rsa.pub
ssh <username>@<ip-address-of-machine-with-apache-installation>
sudo cat /tmp/id_rsa.pub >> ~/.ssh/authorized_keys
sudo rm -rf /tmp/id_rsa.pub
logout
ssh <username>@<ip-address-of-machine-with-apache-installation>
The latter command should now log you in without prompting to enter your password. If none of these commands work, try repeating copying the public key and logging in again a number of times.
To create the SSH tunnel, type in:
sudo ssh -L 9090:localhost:80 -Nf <username>@<ip-address-of-machine-with-apache-installation>
Now open a web browser and type in:
localhost:9090
This should open a web page on the server with the Apache installation saying “It works!”. This set up works well for testing and developing the local GIN instance. However, it is not suitable for providing web services, because individual users need access rights to the server with the Apache installation so that SSH tunnels can be set up on invidual workstations.
Given the considerations above and the lack of open ports on the Self Service Virtual Machines, we are going to switch off the local Apache instance:
sudo systemctl disable httpd && sudo systemctl stop httpd
Install Git and Git-annex#
GIN Client installation depends on git and git-annex version cotrol systems. Therefore, it is a good idea to get them sorted before proceeding with the rest of the GIN installation. Installing recent verions of this software on Centos 7 is a bit tricky. This is an example of how to download and install git version control system on your client node (Server[0]):
sudo yum install epel-release -y
sudo yum install https://repo.ius.io/ius-release-el$(rpm -E '%{rhel}').rpm -y
sudo yum install yum-plugin-replace -y
sudo yum install git -y
sudo yum replace git --replace-with git236 -y
To download and install git-annex version control system, follow these steps:
sudo yum install wget -y
wget https://downloads.kitenet.net/git-annex/linux/current/rpms/git-annex-standalone-10.20221105-1.x86_64.rpm
sudo yum localinstall git-annex-standalone-10.20221105-1.x86_64.rpm -y
rm git-annex-standalone-10.20221105-1.x86_64.rpm
If you get an error when downloading the RPM file, you may need to adjust the RPM filename to match the latest git-annex release available at https://downloads.kitenet.net/git-annex/linux/current/rpms/.
Install GIN#
GIN full server instalation instructions can be found here. We are going to go step by step through these installations adapted for our particular case.
Install GIN client#
Download and install GIN client, so that you are able to download public GIN repositories needed for GIN server installation:
curl --silent --remote-name --location https://gin.g-node.org/G-Node/gin-cli-releases/raw/master/gin-cli-latest-linux.tar.gz
tar -xvf gin-cli-latest-linux.tar.gz
sudo mv gin /usr/bin/
rm README.md
rm gin-cli-latest-linux.tar.gz
Set-up GIN Installation Folders#
We need to set up certain user groups and users, as well as a particular directory structure in order to run GIN on Docker. The bash script file that will do exactly that is provided below:
#!/bin/bash

# Provide the user that will use docker-compose to start the service
DEPLOY_USER=<your-username-string>

# Specify the GIN files root location
DIR_GINROOT=<root-dir-path-string>

# Postgres database password
PGRES_PASS=<pgres-password-string>

# Prepare a ginservice group if it does not exist
if [ $(getent group ginservice) ]; then
  echo "group ginservice already exists."
else
  groupadd ginservice
fi

# Create dedicated "ginuser" user and add it to the "docker"
# group; and the "ginservice" group; create all required
# directories with this user and the "ginservice" group permission.
if [ $(getent passwd ginuser) ]; then
    echo "user ginuser already exists"
else
    useradd -M -G docker,ginservice ginuser
    # Disable login for user ginuser
    usermod -L ginuser
fi
if [ $(getent passwd <your-username>) ]; then
    echo "user <your-username> already exists"
else
    useradd -M -G docker,ginservice <your-username>
    # Disable login for user <your-username>
    usermod -L <your-username>
fi

# Make sure to add the user running docker-compose to the ginservice group as well!
usermod -a -G ginservice $DEPLOY_USER

# Make sure that required directories are empty
rm -rf $DIR_GINROOT

# Required directories
DIR_GINCONFIG=$DIR_GINROOT/config
DIR_GINVOLUMES=$DIR_GINROOT/volumes
DIR_GINDATA=$DIR_GINROOT/gindata

# Create gin specific directories
# The 'notice' directory may contain a banner.md file.
# The content of this file is displayed on the GIN page without a service restart e.g.
#  to inform users of an upcoming service downtime.
mkdir -vp $DIR_GINCONFIG/gogs/notice
mkdir -vp $DIR_GINCONFIG/postgres

mkdir -vp $DIR_GINVOLUMES/ginweb

mkdir -vp $DIR_GINDATA/gin-repositories
mkdir -vp $DIR_GINDATA/gin-postgresdb

mkdir -vp $DIR_GINROOT/gin-dockerfile

# Create an env file to specify the docker compose project name
echo "COMPOSE_PROJECT_NAME=gin" > $DIR_GINROOT/gin-dockerfile/.env

# Create postgres secret file
echo "POSTGRES_PASSWORD=${PGRES_PASS}" > $DIR_GINCONFIG/postgres/pgressecrets.env

# make sure an empty gogs config file is available; technically only required for previous versions of gogs
mkdir $DIR_GINCONFIG/gogs/conf
touch $DIR_GINCONFIG/gogs/conf/app.ini
Open a bash script file in your home directory, for example:
sudo nano gin-docker-folders.sh
Paste the contents of the file as shown above, save, and close the file. You have to provide only three parameters in this file: your username, password, and GIN installation directory. In our case, the GIN installation directory is /home/<your-username>/in-house-gin. Execute this file by typing:
sudo sh gin-docker-folders.sh
Prepare GIN Instance File#
We need to prepare the GIN Docker Compose instance file. First, let’s organise all GIN resources in a single folder:
mkdir in-house-gin-resources
mv gin-docker-folders.sh in-house-gin-resources/
cd in-house-gin-resources
git clone https://gin.g-node.org/G-Node/in-house-gin.git
mv in-house-gin in-house-gin-repo
Now copy, open, and prepare the actual file:
cp in-house-gin-repo/resources/docker-compose.yml docker-compose.yml
sudo nano docker-compose.yml
You need to adjust PUID which is the ginuser user ID. You can find it by typing:
$ sudo cat /etc/passwd
mark:x:1001:1001:mark,,,:/home/mark:/bin/bash
[--] - [--] [--] [-----] [--------] [--------]
|    |   |    |     |         |        |
|    |   |    |     |         |        +-> 7. Login shell
|    |   |    |     |         +----------> 6. Home directory
|    |   |    |     +--------------------> 5. GECOS
|    |   |    +--------------------------> 4. GID
|    |   +-------------------------------> 3. UID
|    +-----------------------------------> 2. Password
+----------------------------------------> 1. Username
Locate the ginuser line and pick the third entry (UID).
PGID (ginservice group ID) is another entry that you need to specify. The following command will help you to find it:
sudo cat /etc/group
Simlarly as before, locate the line starting with ginservice and pick the third entry.
Next, make sure the set ipv4_address (e.g., 12.34.56.78), subnet (e.g., 12.34.56.0/16), and gateway (e.g., 12.34.56.254) matches the IP set in your apache webserver (ServerName entry in /etc/httpd/conf/httpd.conf file) configuration. Type in
ifconfig -a
eth0:inet entry will give you your IP address. Enter this value into the docker-compose.yml file.
You should also change the location where repositories are being stored. Hence change the line below:
- ../gindata/gin-repositories:/data/repos:rw
into this line with repository location pointing to the Ceph storage:
- /mnt/cephfs:/data/repos:rw
When GIN repositories are going to be stored in this location, they are going to be stored as “bare” git (annex) repositories.
Add the Apache container to the GIN instance file by adding the following lines at the bottom of the services list:
apache:
  image: httpd:2.4.54
  restart: always
  ports:
    - "80:80"
    - "443:443"
Finally, comment out all networks entries in the GIN instance file.
Once you finish editing the Docker Compose GIN instance file, copy the file to $DIR_GINROOT/gin-dockerfile directory, like:
sudo cp docker-compose.yml ~/in-house-gin/gin-dockerfile/
To ensure the docker services have access to the recently created directories, change all file ownership and permissions in those directories to ginservice group:
sudo chown -R ginuser:ginservice ~/in-house-gin
sudo chmod -R g+rw ~/in-house-gin
Launch GIN Docker Containers#
All required GIN Docker containers can be downloaded by executing the following commands:
cd ~/in-house-gin/gin-dockerfile/
sudo systemctl start docker
sudo docker compose pull
You should see the following output, if all goes successfully:
[+] Running 36/36
 ⠿ db Pulled                                                                            16.8s
   ⠿ bff3e048017e Pull complete                                                          8.5s
   ⠿ e3e180bf7c2b Pull complete                                                          8.9s
   ⠿ 62eff3cc0cff Pull complete                                                          9.0s
   ⠿ 3d90a128d4ff Pull complete                                                          9.2s
   ⠿ ba4ce0c5ab29 Pull complete                                                          9.9s
   ⠿ a8f4b87076a9 Pull complete                                                         10.2s
   ⠿ 4b437d281a7e Pull complete                                                         10.3s
   ⠿ f1841d9dcb17 Pull complete                                                         10.4s
   ⠿ bf897300657d Pull complete                                                         13.6s
   ⠿ 3bfdfb831df4 Pull complete                                                         13.6s
   ⠿ c44ac1fcc543 Pull complete                                                         13.7s
   ⠿ 9ad3441d354a Pull complete                                                         13.7s
   ⠿ 2d79312566dd Pull complete                                                         13.8s
 ⠿ apache Pulled                                                                        13.4s
   ⠿ 3f4ca61aafcd Pull complete                                                          8.0s
   ⠿ 2e3d233b6299 Pull complete                                                          8.2s
   ⠿ 6d859023da80 Pull complete                                                          8.6s
   ⠿ f856a04699cc Pull complete                                                         10.3s
   ⠿ ec3bbe99d2b1 Pull complete                                                         10.4s
 ⠿ web Pulled                                                                           14.5s
   ⠿ cbdbe7a5bc2a Pull complete                                                          0.7s
   ⠿ f80baed5aab5 Pull complete                                                          0.9s
   ⠿ 89a388a79898 Pull complete                                                          4.1s
   ⠿ ed5cc09825c1 Pull complete                                                          4.4s
   ⠿ 5cb6da02d7ec Pull complete                                                          4.5s
   ⠿ 43ec29b48c77 Pull complete                                                          4.5s
   ⠿ 7e446e441c17 Pull complete                                                          5.2s
   ⠿ defb6c422296 Pull complete                                                         10.0s
   ⠿ 88d0869d42fa Pull complete                                                         10.2s
   ⠿ b478dc392bf5 Pull complete                                                         10.3s
   ⠿ 496764bd3222 Pull complete                                                         10.4s
   ⠿ e92de83a3850 Pull complete                                                         10.5s
   ⠿ c4ca3f12302e Pull complete                                                         10.6s
   ⠿ 391654d516ba Pull complete                                                         11.6s
   ⠿ 366413088261 Pull complete                                                         11.7s
Launch the database container:
$ sudo docker compose up -d db
[+] Running 3/3
 ⠿ Network gin_net      Created                                                         0.2s
 ⠿ Volume "gin_gintmp"  Created                                                         0.0s
 ⠿ Container gin-db-1   Started                                                         0.3s
Set up the postgres database container:
sudo docker exec -it gin-db-1 /bin/bash
su -l postgres
createuser -P gin
# enter a password for the new role and note it; it will later be used on the initial gin setup page
createdb -O gin gin
exit
exit
Launch database, web, and apache containers:
$ sudo docker compose up -d
[+] Running 3/3
 ⠿ Container gin-apache-1  Started                                                      0.5s
 ⠿ Container gin-db-1      Running                                                      0.0s
 ⠿ Container gin-web-1     Started                                                      0.6s
Reconfigure the apache docker container. First, get the default configuration file from the apache container and edit it:
sudo docker cp gin-apache-1:/usr/local/apache2/conf/httpd.conf ~/in-house-gin-resources/
sudo nano ~/in-house-gin-resources/httpd.conf
Inside the file replace the line
Listen 80
with these lines:
#Listen 80
Listen [::]:80
Listen 0.0.0.0:80
Comment the line giving away system admin email, like this:
#ServerAdmin you@example.com
Replace the line defining ServerName
#ServerName www.example.com:80
with the lines:
#ServerName www.example.com:80
ServerName <ip-address-of-machine-with-apache-installation>
Uncomment lines for loading proxy server modules:
LoadModule proxy_module modules/mod_proxy.so
LoadModule proxy_http_module modules/mod_proxy_http.so
At the bottom of the file add the following definitions:
# Additional entries below
# Hide Apache version from header and from error files
ServerTokens prod
ServerSignature off

# Disable ETag to prevent disposing sensitive values like iNode
FileETag none

# Apache proxypass configuration
ProxyPass "/"  "http://gin-web-1:3000/"
ProxyPassReverse "/"  "http://gin-web-1:3000/"

# Prevent exposing debug console
<Location /debug>
    Deny from  all
</Location>
Copy the edited Apache configuration to the docker apache container:
sudo docker cp ~/in-house-gin-resources/httpd.conf gin-apache-1:/usr/local/apache2/conf/httpd.conf
sudo docker exec -it gin-apache-1 apachectl graceful
Both database, web, and apache containers should now be running with no problem. You can see them by typing (while inside the folder with the GIN instance file):
$ sudo docker compose ps
NAME          IMAGE                 COMMAND                 SERVICE  CREATED      STATUS      PORTS
gin-apache-1  httpd:2.4.54          "httpd-foreground"      apache   2 hours ago  Up 2 hours  0.0.0.0:80->80/tcp, :::80->80/tcp
gin-db-1      postgres:11           "docker-entrypoint.s…"  db       2 hours ago  Up 2 hours  5432/tcp
gin-web-1     gnode/gin-web:latest  "/app/gogs/docker/st…"  web      2 hours ago  Up 2 hours  3000/tcp, 0.0.0.0:2121->22/tcp, :::2121->22/tcp
The command output indicates the running status of all containers. If this is not the case, you should identify the cause of it and relaunch the containers after fixing it. Condensed instruction for relaunching containers are provided in the next subsection. Otherwise, if containers are runnig fine, skip the next subsection, and connect to the GIN service.
Relaunch GIN Docker Containers#
In case something goes wrong with your GIN Docker containers and they need to be wiped out and reinstated, run the lines below (obviously make sure you fix the cause of the failure beforehand and reboot the machine if needed):
cd ~/in-house-gin/gin-dockerfile
sudo systemctl start docker
sudo docker compose down
sudo docker system prune --all --force

cd ~/in-house-gin-resources
sudo sh gin-docker-folders.sh
sudo cp docker-compose.yml ~/in-house-gin/gin-dockerfile/
sudo chown -R ginuser:ginservice ~/in-house-gin
sudo chmod -R g+rw ~/in-house-gin

cd ~/in-house-gin/gin-dockerfile
sudo docker compose pull
sudo docker compose up -d db

sudo docker exec -it gin-db-1 /bin/bash
su -l postgres
createuser -P gin
createdb -O gin gin
exit
exit
sudo docker compose up -d

sudo docker cp ~/in-house-gin-resources/httpd.conf gin-apache-1:/usr/local/apache2/conf/httpd.conf
sudo docker exec -it gin-apache-1 apachectl graceful
Setup GIN Service#
To set up the GIN Service, you have to launch the install page. You would find it by typing the Bristol GIN domain name into the web browser followed by http or https port into the web browser:
<ip-address-of-machine-with-apache-installation>:<http-or-https-port>
On the setup page, set the following fields with the corresponding values. For other setup options please refer to the gogs documentation.
db: postgreSQL
host: gin-db-1:5432
user: gin
password: <used-during-database-setup-and-in-gin-docker-folders.sh-file>
database name: gin
app name: GIN dev
repo root: as defined in the GIN instance file on the container side (e.g.,
/data/repos)domain:
<ip-address-of-machine-with-apache-installation>
Now go to the Bristol GIN domain and register a new account. This user will also have admin privileges. The figure below shows an example:
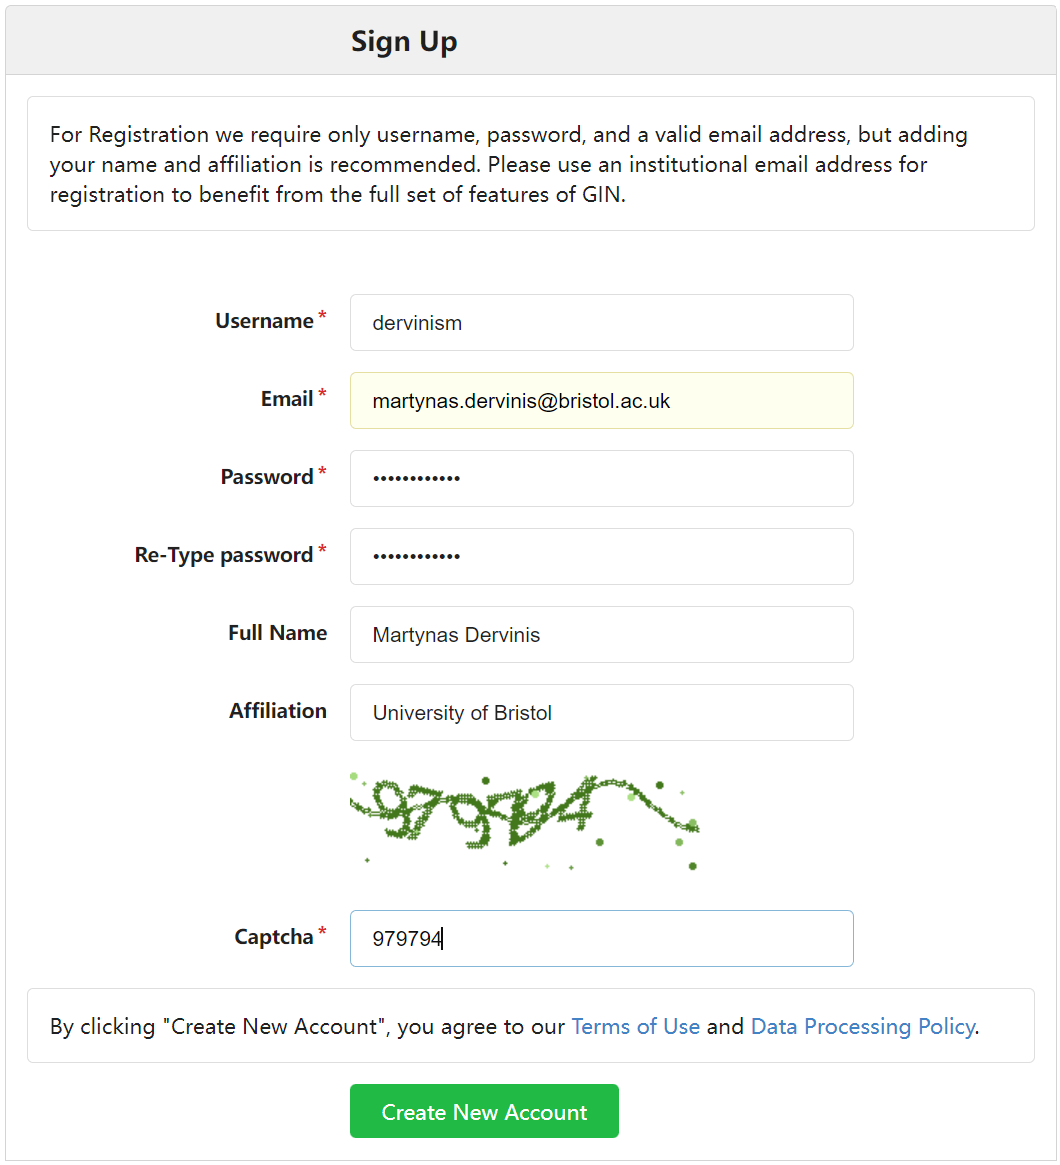
Figure 1. Register Your Account
After signing in you should see an empty account. Next, stop all the Docker containers:
cd ~/in-house-gin/gin-dockerfile
sudo docker compose down
and replace the old app.ini file with the one from ~/in-house-gin-repo/resources:
sudo mv ~/in-house-gin/config/gogs/conf/app.ini ~/in-house-gin-resources/old-app.ini
cp in-house-gin-repo/resources/app.ini .
sudo nano app.in
Set the following variables as below:
APP_NAME = GIN dev
HOST = gin-db-1:5432
PASSWD = <used-during-database-setup-and-in-gin-docker-folders.sh-file>
DOMAIN = 172.18.18.50
HTTP_PORT = 3000
ROOT_URL = http://172.18.18.50
SECRET_KEY = <old-value>
and copy the adjusted file to the right location:
sudo cp ~/in-house-gin-resources/app.ini ~/in-house-gin/config/gogs/conf/
Copy the public and templates directories from ~/in-house-gin-repo to ~/in-house-gin/config/gogs:
sudo cp -r ~/in-house-gin-resources/in-house-gin-repo/public ~/in-house-gin/config/gogs/
sudo cp -r ~/in-house-gin-resources/in-house-gin-repo/templates ~/in-house-gin/config/gogs/
This directory is specified via the docker-compose.yml file to hold custom frontend templates for the GIN instance.
Adjust file permissions for all added and modified files on the server:
sudo chown -R ginuser:ginservice ~/in-house-gin
Stop any running container and restart the full service:
cd ~/in-house-gin/gin-dockerfile
sudo docker compose down
sudo docker compose up -d
sudo docker compose logs -f
Note
This section is work in progress. Current priority!